SPFx Web Part. Getting presence information of users from Microsoft Teams
Microsoft Teams was released in 2017, and it took about three years to get an API that makes it possible to get user online presence status. We had to use a workaround. But as for today, we have the REST API method to get user presence information.
In this post, I'll show you how to get user presence information within SPFx Web Part.
Create new web part
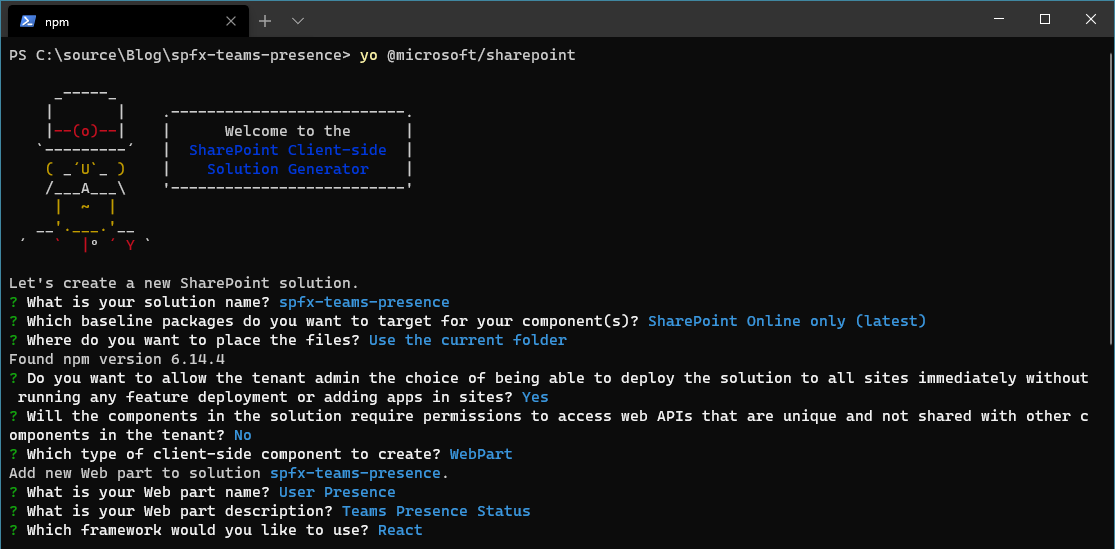
Open your terminal and run the following command to create a new SPFx web part:
yo @microsoft/sharepoint
Packages
To get user presence you need to provide AAD identifier of the user. To get AAD identifier you need to know the user principle name. To achieve this goal (getting principal name) we will use spfx-controls react. Run the command to add the package to the project:
npm install @pnp/spfx-controls-react --save --save-exact
It's the only extra npm-package we need to get success.
Once the wizard has completed its work and the package installed run code . to open Visual Studio Code or other similar IDE you prefer to use.
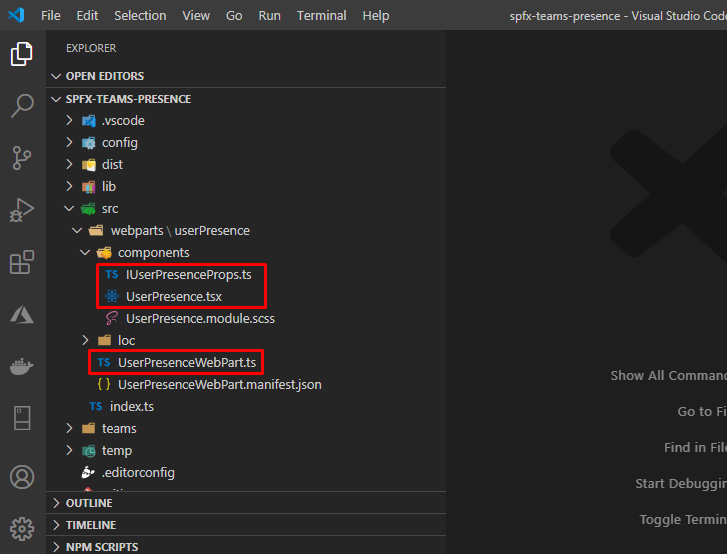
Marked files will be changed.
Solution Overview
The solution is a little ugly in order to simplify source code.
UI
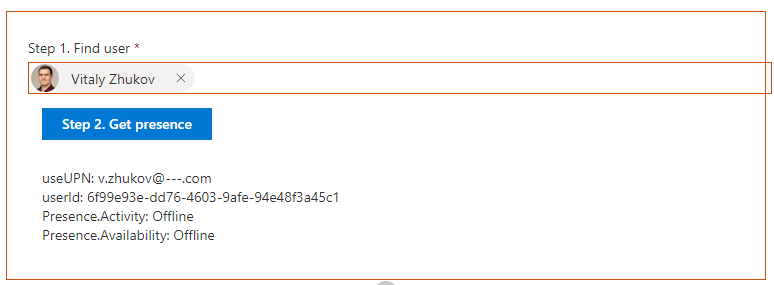
The user interface of the web part contains three elements: People Picker to find the user within the tenant, Action Button to init getting presence information, and set of text elements to show the result.
Flow
The business flow of the web part has three steps:
- Select the user with the People Picker control (People Picker returns account name)
- Provide the account name to Microsoft Graph to get user AAD identifier
- Provide the AAD identifier to Microsoft Graph to get presence information
Code
The Code of the web part contains only the necessary modification to demonstrate the capability.
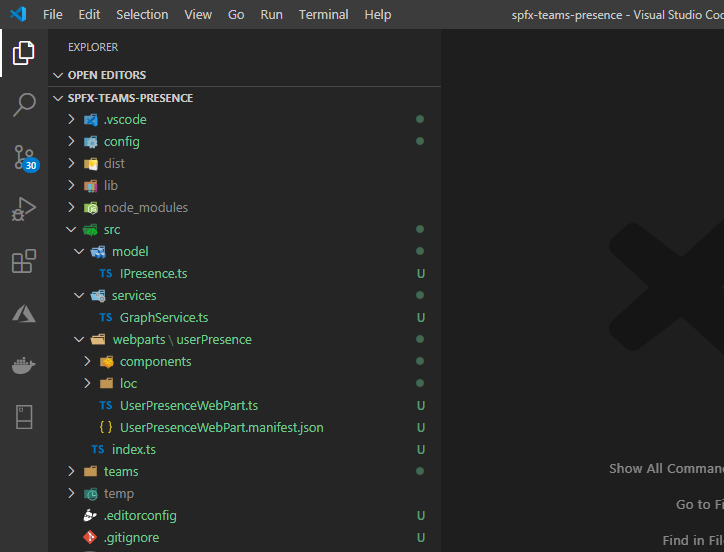
Model
First of all, we need to define a user presence object. Create folder model in src folder, then create IPresence.ts file with the following content:
export interface IPresence {
  Availability: string;
  Activity: string;
}
Next, extend properties and state of the web part component to store SharePoint client content object and current state of the web part (account name, user Id, presence information). Open src\components\IUserPresenceProps.ts and replace its contents with the following:
import { WebPartContext } from "@microsoft/sp-webpart-base";
import { IPresence } from "../../../model/IPresence";

/**
 * Properties of the component
 */
export interface IUserPresenceProps {
  context: WebPartContext;
}

/**
 * State of the component
 */
export interface IUserPresenceState{
  userUPN?: string;
  userId?: string;
  presence?: IPresence;
}
Microsoft Graph Client
The web part uses Microsoft Graph as a data source of users and presence information. To handle request create folder services in src folder, add new file GraphService.ts:
import { WebPartContext } from "@microsoft/sp-webpart-base";
import { MSGraphClient } from "@microsoft/sp-http";
import { IPresence } from '../model/IPresence';

export default class GraphService {

    private context: WebPartContext;

    constructor(private _context: WebPartContext) {
        this.context = _context;
    }

    /**
     * Gettinguser presence information
     * @param userId AAD user identity
     */
    public getPresence(userId: string): Promise<IPresence> {
        return new Promise<IPresence>((resolve, reject) => {
            this.context.msGraphClientFactory
                .getClient() // Init Microsoft Graph Client
                .then((client: MSGraphClient): Promise<IPresence> => {
                    return client
                        .api(`users/${userId}/presence`) //Get Presence method
                        .version("beta") // Beta version
                        .get((err, res) => {
                            if (err) {
                                reject(err);
                                return;
                            }
                            // Resolve presence object
                            resolve({
                                Availability: res.availability,
                                Activity: res.activity,
                            });
                        });
                });
        });
    }

    public getUserId(userUPN: string): Promise<string> {
        return new Promise<string>((resolve, reject) => {
            this.context.msGraphClientFactory
                .getClient() // Init Microsoft Graph Client
                .then((client: MSGraphClient): Promise<IPresence> => {
                    return client
                        .api(`users/${userUPN}`) //Get Presence method
                        .version("beta") // Beta version
                        .select("id") // Select only ID attribute
                        .get((err, res) => {
                            if (err) {
                                reject(err);
                                return;
                            }
                            // Resolve presence object
                            resolve(res.id);
                        });
                });
        });
    }
}
There are two methods defined in the service:
- getUserId accepts account name (user@domain.com) and returns Azure AD identifier of the user
- getPresence accepts user ID and return presence information
Component
Open src\webparts\userPresence\userPresence.tsx file and replace its contant with this:
import * as React from 'react';
import styles from './UserPresence.module.scss';
import { IUserPresenceProps, IUserPresenceState } from './IUserPresenceProps';
import { PeoplePicker, PrincipalType } from "@pnp/spfx-controls-react/lib/PeoplePicker";
import { Button } from 'office-ui-fabric-react';
import GraphService from '../../../services/GraphService';

export default class UserPresence extends React.Component<IUserPresenceProps, IUserPresenceState> {
  constructor(props: IUserPresenceProps) {
    super(props);
    this.state = {};

    // Bind Handlers
    this._buttonClick = this._buttonClick.bind(this);
    this._getPeoplePickerItems = this._getPeoplePickerItems.bind(this);

    // Init Microsoft Graph Service
    this._graphService = new GraphService(this.props.context);
  }

  private _graphService: GraphService

  public render(): React.ReactElement<IUserPresenceProps> {
    return (
      <div className={styles.userPresence}>
        {/* People Picker */}
        <div className={styles.container}>
          <PeoplePicker context={this.props.context} titleText="Step 1. Find user"
            selectedItems={this._getPeoplePickerItems} principalTypes={[PrincipalType.User]} />
        </div>
        {/* / People Picker */}

        {/* Button */}
        <div className={styles.container}>
          <Button text="Step 2. Get presence" className={styles.button}
            disabled={!this.state.userUPN} onClick={this._buttonClick} />
        </div>
        {/* / Button */}

        {/* State */}
        <div className={styles.container}>
          <label>useUPN:</label> {this.state.userUPN}<br />
          <label>userId:</label> {this.state.userId}<br />
          <label>Presence.Activity:</label> {this.state.presence ? this.state.presence.Activity : ""}<br />
          <label>Presence.Availability:</label> {this.state.presence ? this.state.presence.Availability : ""}
        </div>
        {/* / State */}
      </div>
    );
  }

  private _buttonClick() {
    this._graphService.getUserId(this.state.userUPN)
      .then(userId => {

        // Update User Id
        this.setState({
          userId: userId
        });

        this._graphService.getPresence(this.state.userId)
          .then(presence => {

            // Update Presence
            this.setState({ presence: presence });
          });
      });
  }

  private _getPeoplePickerItems(items: any[]): void {

    // Break if number of users does not equal 1
    if (items.length != 1) {
      return;
    }

    // Update User UPN
    this.setState({
      userUPN: items[0].secondaryText
    });
  }
}
The difference with the default component:
- Added the State object
- Added constructor which accepts WebPartContext instead of the default description property
- Changed UI in order to the solution overview (picker, button, state information)
- Added two handlers: one for people picker and another one for the button.
WebPart
The last file we need to change is src\webparts\userPresence\UserPresenceWebPart.ts. Open it and update is content:
import * as React from 'react';
import * as ReactDom from 'react-dom';
import { Version } from '@microsoft/sp-core-library';
import { BaseClientSideWebPart } from '@microsoft/sp-webpart-base';
import UserPresence from './components/UserPresence';
import { IUserPresenceProps } from './components/IUserPresenceProps';

export default class UserPresenceWebPart extends BaseClientSideWebPart <{}> {
  public render(): void {
    const element: React.ReactElement<IUserPresenceProps> = React.createElement(
      UserPresence,
      {
        context: this.context // WebPartContext to init Microsoft Graph client
      }
    );
    ReactDom.render(element, this.domElement);
  }

  protected onDispose(): void {
    ReactDom.unmountComponentAtNode(this.domElement);
  }

  protected get dataVersion(): Version {
    return Version.parse('1.0');
  }
}
Summary
What was done:
- Added package spfx-controls-react to use People Picker control
- Created interface IPresence to define Teams presence information
- Created IUserPresenceState to store the state of the web part (selected user, user id, presence information)
- Modified IUserPresenceProps to pass WebPartContext object from the web part to child component
- Created GraphService to interact with Microsoft Graph
- Modified UserPresence component in order to display picker, button, and text
- Modified UserPresenceWebPart to pass the context to the UserPresence component
Preview the web part
Run the command in your terminal to start the web part:
npm run --nobrowser
and open your SharePoint Online workbench:
https://[tenant].sharepoint.com/_layouts/15/workbench.aspx
add the web part and use it:

Permissions
To get Microsoft Teams presence information with Microsoft Graph you need to grant Presence.Read (least privileged) or Presence.Read.All (most privileged) permissions to your web part.
Source Code
The source code published on GitHub: https://github.com/vzhukov/spfx-teams-presence.